IPv6 in Avi Vantage for VMware/Linux Server Cloud
This article discusses enabling and testing IPv6 on Avi Vantage in a bare-metal, VMware read/write/no-access, and Linux server cloud.
Overview
Deploying IPv6 at the load balancer stage allows servicing IPv6 requests without having to establish IPv6 connectivity to any of the servers hosted behind the load balancer. With this setup, you can deploy and test IPv6 applications with minimum changes to the current configuration.
Avi Vantage provides full IPv6, dual-stack IPv4 and IPv6 connectivity to the load balancing network without relying on tunnelling solutions. You can ensure the best possible combination of throughput and performance for all your IPv6-enabled clients.
Ecosystem Support
This article discusses deployment support for the below mentioned ecosystems. For other supported ecosystems and related documentation refer to IPv6 Support in Avi Vantage.
| Sl.No | Ecosystem Support | Driver/NIC Type | Service Engine Addressing |
|---|---|---|---|
| 1 | Bare metal | DPDK/PCAP | Static |
| 2 | VMware read/write/no-access | DPDK | Static / DHCPv6 |
| 3 | Linux server cloud | DPDK/PCAP | Static |
Points to Consider
-
To install the Avi Controller in bare-metal environment using Avi CLI, refer to Install Avi Controller Image. To select the DPDK mode, enter a Yes at the prompt. This is applicable for Service Engines as well.
-
Active/active and N+M are the supported HA modes.
-
Multiple IPv6 IPs for VIP are not supported.
-
Service Engine IP addresses will be static for this testing.
-
IPv4 and IPv6 VIPs need to be on the same interface for the virtual service placement not to fail.
-
The use cases are executed with configuration in a single-arm set-up and can be easily implemented using two-arm mode as well.
Configuration Steps
The CLI configuration requires access to the Controller shell as shown in the example below. Begin with the host and from there login to the Avi Controller, followed by shell access.
root@user:~# ssh root@10.140.1.4
root@10.140.1.4's password:
Last login: Thu Nov  2 17:50:53 2017 from 172.17.0.2
[root@avi-bgl-bm-centos1 ~]# docker exec -it avicontroller bash
root@10-140-1-4:/# shell
Login: admin
Password:
[admin:10-140-1-4]: >
The configuration hierarchy is as follows:
- Service Engine
- Pool (s)
- Virtual service
Use Case Scenarios
This section explains the configuration required in the following use cases:
- IPv6 VIP with IPv6 and IPv4 Backend
- IPv4v6 VIP (Dual Stack) with IPv6 & IPv4 Backend
- Layer 2 Scale Out
- Layer 2 Scale In
Use Case-1: IPv6 VIP with IPv6 and IPv4 Backend
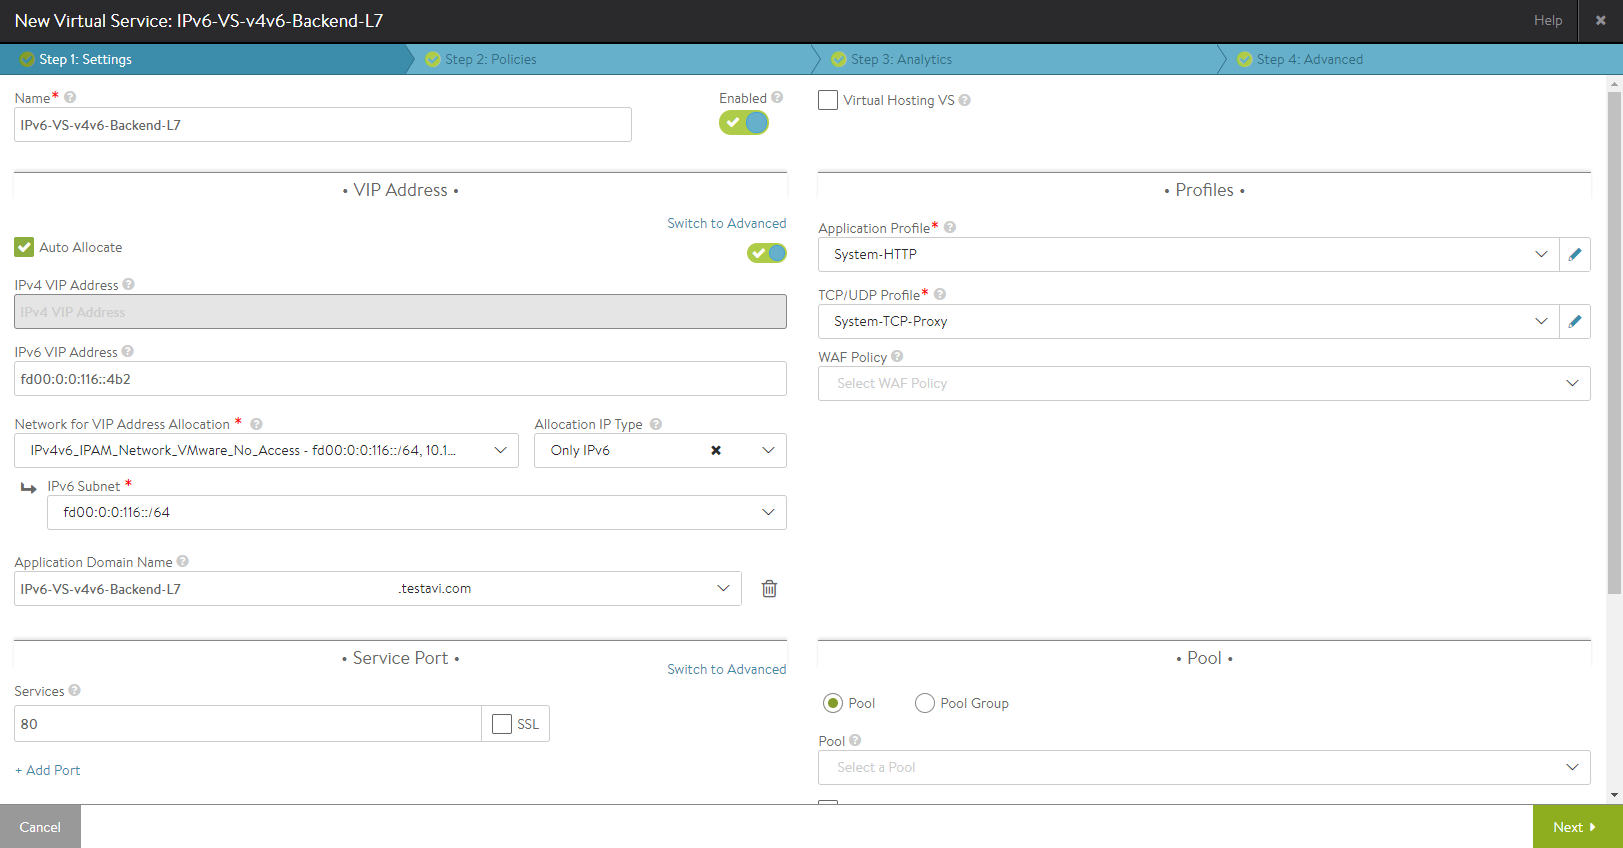
To configure an IPv6 VIP on UI, navigate to Applications > Virtual Services and click on Create Virtual Service (Advanced Setup). Choose the appropriate cloud and configure the virtual service details.
On choosing Auto Allocate, select Only IPv6 from the dropdown list for Allocation IP Type and select an appropriate network from the dropdown list for Network for VIP Address Allocation.
Alternatively, without choosing auto allocate, you can manually enter the VIP address under the IPv6 VIP Address field.
Navigate though rest of the tabs and complete the configuration.
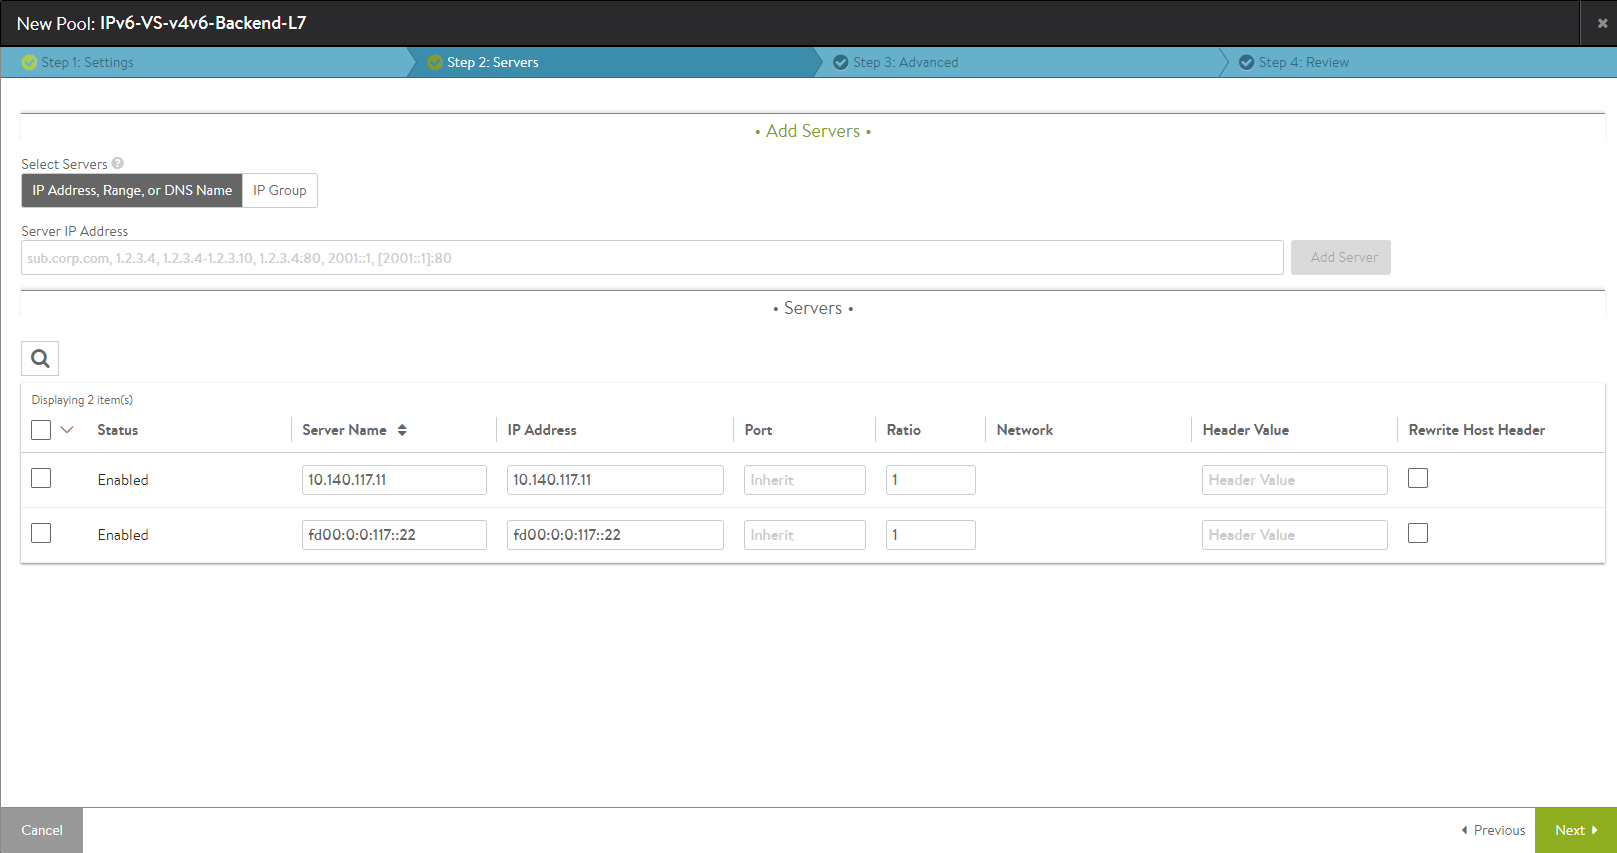
To configure an IPv4 and IPv6 backend pool, either select Create Pool from the dropdown list for Pool under the Pool section in the Settings tab for virtual service configuration or from the main menu navigate to Applications > Pools and click on Create Pool.
Choose the appropriate cloud and configure the pool details. Under the Servers tab, enter the IPv4 server IP address under Server IP Address and click on Add Server. Additionally, enter the IPv6 server IP address and click on Add Server. Click on Next to navigate through rest of the tabs and complete the configuration.
Now the virtual service should be up and you would be able to send traffic (ICMP, ICMPv6, Curl) to it from the clients.
Figure 1. Curl traffic to the virtual service. Servers are load balancing the traffic in a round robin fashion (for IPv6 VIP Type)
Figure 2. Associated health monitors seen on the right side with echo request and reply for ICMPv6.
Use Case-2: IPv4v6 VIP (Dual Stack) with IPv6 & IPv4 Backend
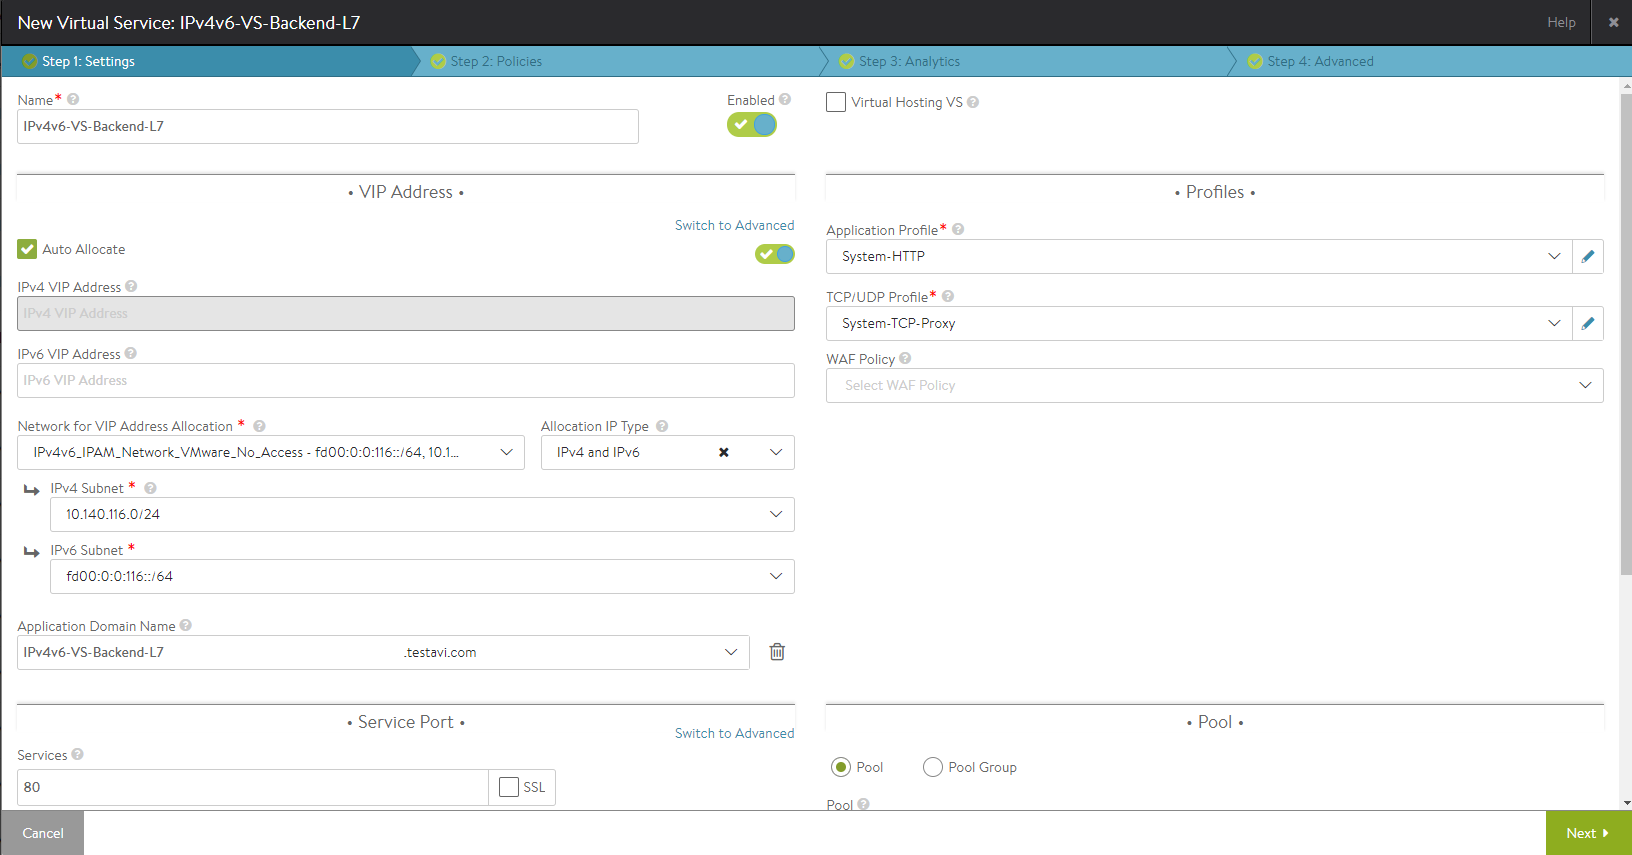
To configure an IPv4v6 VIP on UI, navigate to Applications > Virtual Services and click on Create Virtual Service (Advanced Setup). Choose the appropriate cloud and configure the virtual service details.
On choosing Auto Allocate, select IPv4 and IPv6 from the dropdown list for Allocation IP Type and select an appropriate network from the dropdown list for Network for VIP Address Allocation. Select the relevant network from the dropdown lists for IPv4 Subnet and IPv6 Subnet.
Alternatively without choosing auto allocate, you can manually enter the VIP address under the IPv4 VIP Address and IPv6 VIP Address fields.
Navigate though rest of the tabs and complete the configuration.
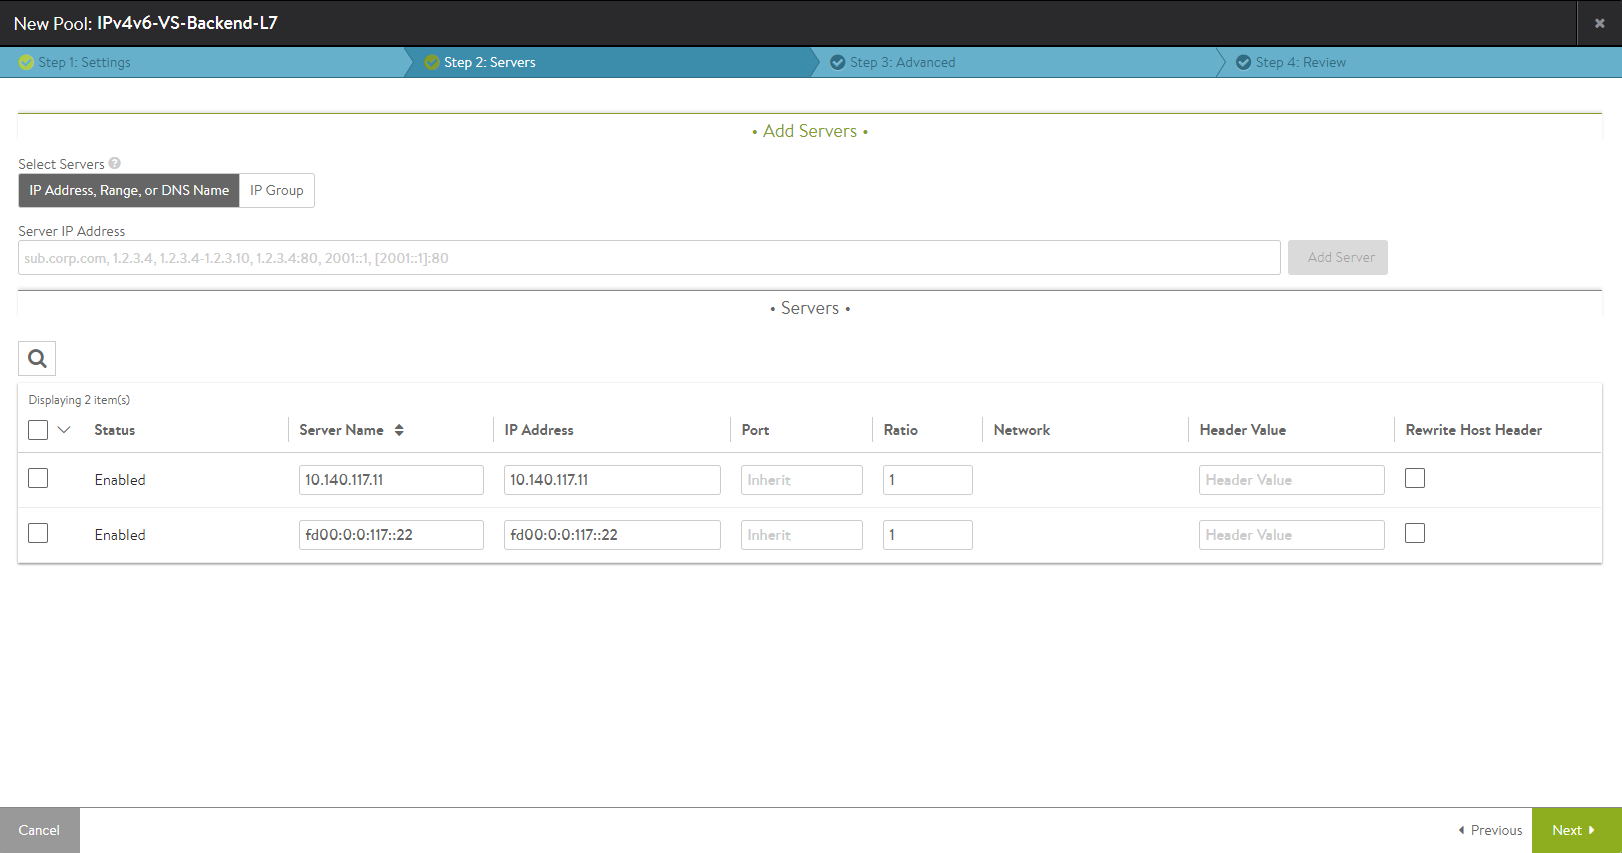
To configure an IPv4 and IPv6 backend pool, either select Create Pool from the dropdown list for Pool under the Pool section in the Settings tab for virtual service configuration or from the main menu navigate to Applications > Pools and click on Create Pool.
Choose the appropriate cloud and configure the pool details. Under the Servers tab, enter the IPv4 server IP address under Server IP Address and click on Add Server. Additionally, enter the IPv6 server IP address and click on Add Server. Click on Next to navigate through rest of the tabs and complete the configuration.
Now the virtual service should be up and you would be able to send traffic (ICMP, ICMPv6, Curl) to it from the clients.
Figure 3. Curl traffic to the virtual service. Servers are load balancing the traffic in round robin fashion (for IPv4v6 (Dual-Stack) VIP Type)
Use Case-3: Layer 2 Scale Out
IPv6 addresses should be added to the respective Service Engine, which will be scaled out. Click on the relevant virtual service and hover over it. You will notice a Scale Out tab and clicking on that should trigger a scale out for the respective Service Engine (SE).
As seen in the figure below, the traffic is scaled out to multiple SEs post a scale out. In this use case, the three SEs considered were 2001::22, 2001::33, and 2001::44.
Figure 4. L2 scale out across multiple Service Engines
Use Case-4: Layer 2 Scale In
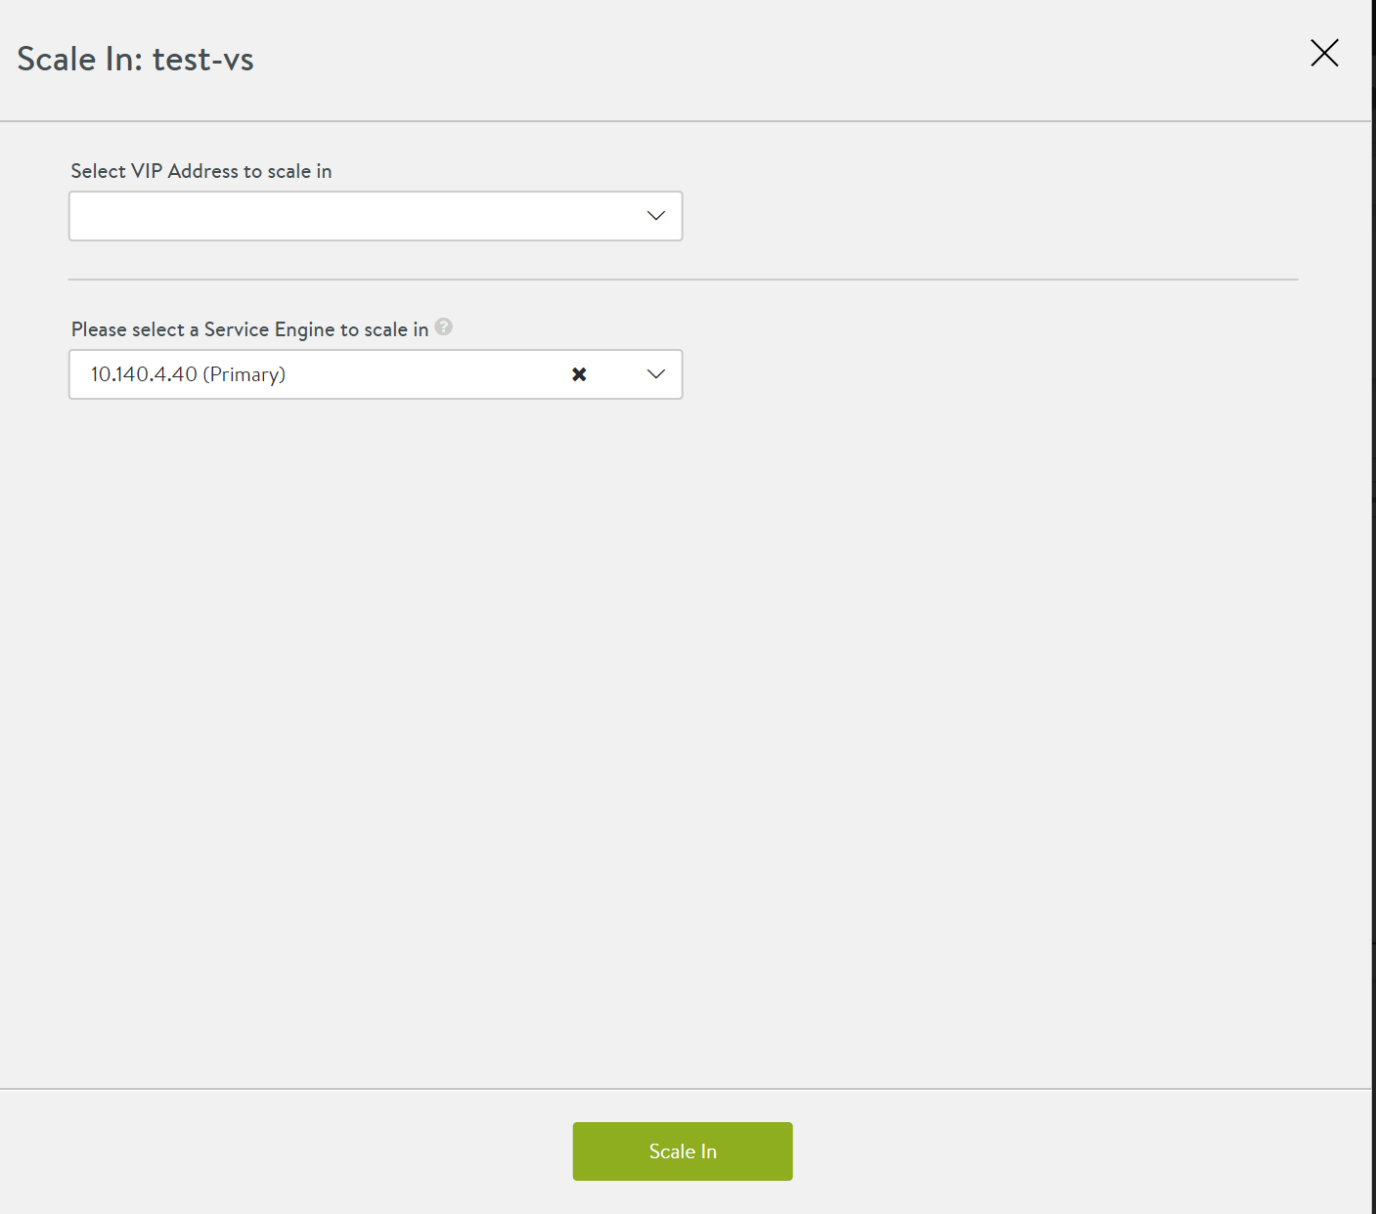
Click on the relevant virtual service and hover over it. You will notice a Scale In tab and that should trigger a scale in for the respective Service Engine (SE).
As seen in the figure below, the traffic is scaled in. The SE serving the traffic was 10.140.4.40 and post the scale in, another SE 10.140.4.41 has taken up the primary role.
Figure 6. L2 scale in with another SE acting in primary role post scale in

