Configuring Avi Vantage For Application Delivery In Linux Server Cloud
This article describes how to configure a Linux server cloud on the Avi Controller and thereafter add Linux hosts as Service Engines (SEs) to it. Running Avi Vantage directly on Linux servers leverages the raw horsepower of the underlying hardware without the overhead added by a virtualization layer. For example, running Avi Vantage directly on Linux servers that support Data Plane Development Kit (DPDK) allows the feature’s optimized packet processing to be leveraged for virtual service traffic.
Notes:
- When adding a Linux host that is equipped with an OS and NIC on which DPDK is supported by Avi Vantage, ensure that DPDK option is enabled.
- Avi Networks recommends that users disable hyperthreading (HT) in the BIOS of the Linux servers upon which Avi Vantage runs prior to installing Avi Vantage on them. It doesn’t get changed often, but RHEL, OEL and CentOS may map physical and hyperthreaded cores differently. Rather than basing its decision on the behaviour or characteristics of a core, Avi Vantage has a predictive map of the host OS via which it skips or ignores hyperthreaded cores. When an OS gets upgraded, this map might change, which means we might be utilizing a HT core instead of a virtual core, which in turn will impact performance.
Docker Container
The Avi Vantage Linux server cloud solution uses containerization provided by Docker for support across operating systems and for easy installation.
Deployment Prerequisites
This section lists the minimum requirements.
Hardware Requirements
Each Linux server to be managed by Avi Vantage must meet at least the following physical requirements:
Docker local storage (default is /var/lib/docker) should contain at least 18 GB to run Avi containers. If an Avi SE is instantiated through the cloud UI, add 5 GB to run it.
| Component | Minimum Requirement |
|---|---|
| CPU | Intel Xeon with 8 cores |
| Memory | 24 GB RAM |
| Disk | 64 GB |
| Network Interface Controller (NIC) | For Intel NICs, refer to this section of the Ecosystem Support article For Mellanox NICs, refer to Mellanox Support on Avi Vantage |
Software Requirements
Installation of Avi Vantage for a Linux server cloud also requires the following software:
| Software | Version |
|---|---|
| Avi Vantage (distributed by Avi Networks as Docker image) | 16.2 or greater |
| Docker (image management service that runs on Linux) | 1.6.1 or greater |
| Operating systems (OS) and kernel versions to enable DPDK | Refer to the Ecosystem Support article |
Note: You can place the Avi Controller and Service Engine containers on the same host starting only from RHEL version 7.4. If co-located on the same host, restarting either container will fail for RHEL versions lesser than 7.4.
Default port assignments are as shown below. If these are in use, chose alternative ports for the purposes listed.
| Ports | Purpose |
|---|---|
| 5098 | SSH (CNTRL_SSH_PORT) |
| 8443 | Secure bootstrap communication between SE and Controller (SYSINT_PORT) |
| 80, 443 | Web server ports (HTTP_PORT, HTTPS_PORT) |
| UDP 123 | NTP |
Installation
For each Linux server that will host an Avi SE, configuration of some SSH settings is required. At a minimum, an SSH user account must be added to the Avi Controller, and the public key for the account must be installed in the authorized keys store on each of the Avi SE hosts. If an SSH user name other than “root” will be used, some additional steps are required.
1. Perform Initial Setup of Avi Controller
Use a web browser to navigate to the Avi Controller and start the setup wizard to configure basic system settings, i.e., create the administrator account, provide DNS and NTP server information, email/SMTP information, and choose Linux as the infrastructure type, as shown below.
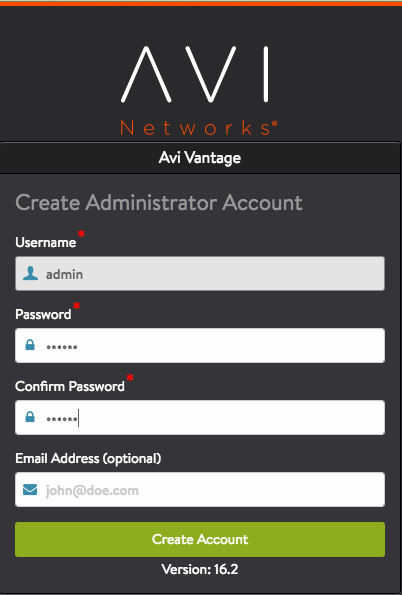
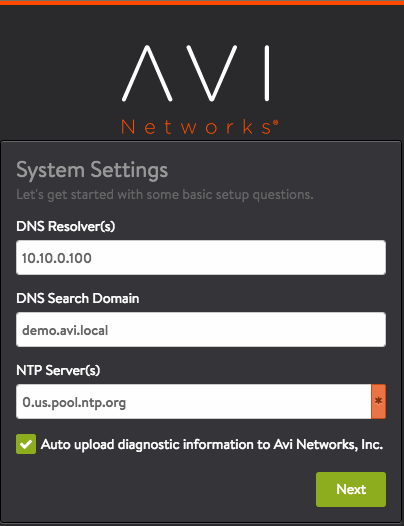
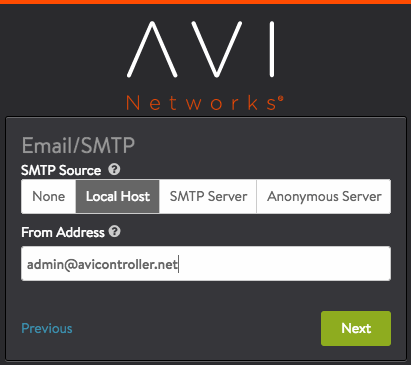
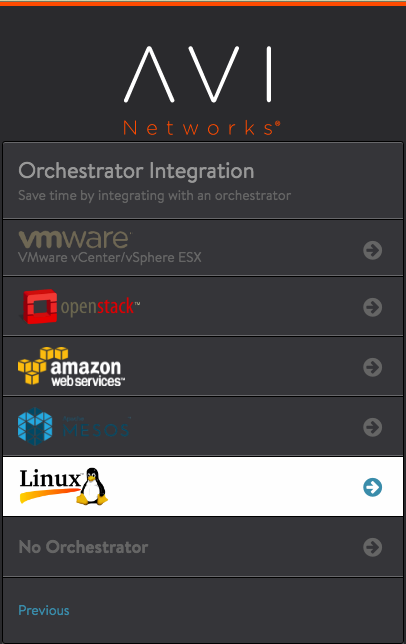 The rest of the configuration information prompted for by the wizard also can be entered now while using the wizard, or any time after installation is complete.
- SSH user and keys — To use the “root” account (simpler option), select Create SSH User, enter the name, select Generate SSH Key Value Pair and click on Generate SSH Key Pair. Then click on Copy to clipboard, and save the key in a text file. (This file will be useful soon.)
- Avi SE hosts — After SSH access is set up on each Avi SE host, the hosts can be added to the Avi Controller. For now, click Complete.
-
Multitenancy support — For now, select No. This can be configured at any time later, if needed. After the wizard closes, see the following articles to complete the installation and create virtual services:
2. Set up SSH Access to the Avi SE Hosts
If you are continuing with the wizard, this section describes how to add the SSH account information to the Avi Controller, and to then copy the SSH public key to each of the Avi SE hosts.
Note: If the wizard has timed out or you have decided to click through the rest of the wizard and do the SSH setup later, go here instead, when ready. See the same link if using an account other than “root.” This section assumes that “root” will be used.
On the Avi Controller:
- When the SSH User wizard page appears, click Create SSH User.
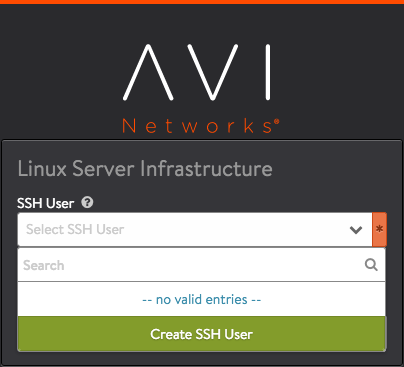
- Enter the username ("root").
- Click Generate, then click Copy to clipboard.
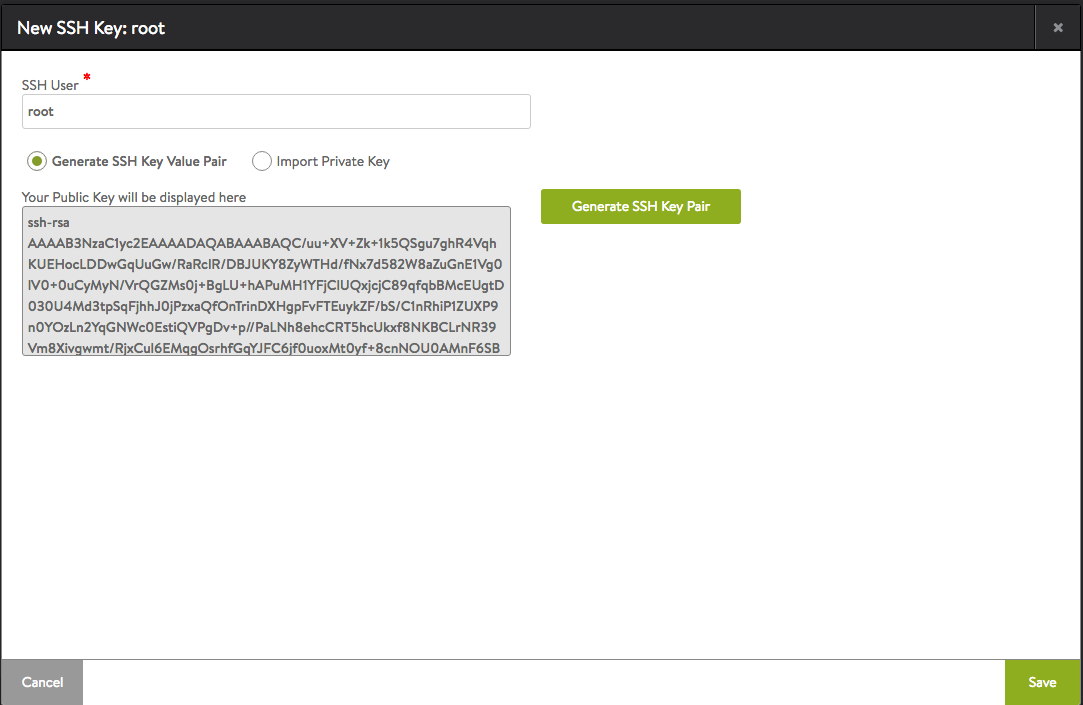
- Click Save.
- Open a text editor, paste the key from the clipboard, and save the file.
On each Avi SE Host:
Leaving the wizard open, use another window or device to open a CLI session in the Linux shell on one of the Avi SE hosts.
- Log into the Linux shell on the Avi SE host (in this example, 10.130.164.76):
ssh root@10.130.164.76
password:
- Prepare the Avi SE host for adding the key from the Avi Controller:
mkdir .ssh && chmod 700 .ssh && cd .ssh
- Add the Avi Controller's public key to the authorized key file by pasting the key copied from the Avi Controller into the following command line:
echo "paste-key-file-copied-from-Controller" >> authorized_keys
chmod 644 authorized_keys
Use quotation marks to delimit the pasted key string. (If the authorized_keys file does not already exist, the command string also creates the file.)
- Repeat these steps on each Avi SE host.
Example:
mkdir .ssh && chmod 700 .ssh && cd .ssh
echo "ecdsa-sha2-nistp256 AAAAE2VjZHNhLXNoYTItbmizdHAyNTYAAAAlbmlzdHAyNTYAAABBBAHjOSUo8AVTISniFZ05UwOsce8/CxMhZ0myWFeRJJSnEC/T09EwOj+z6uMbnTEC+AHrYAEMgVCkdlhYfmWlrCg=root@Avi-Controller" >> authorized_keys
chmod 644 authorized_keys
Note: Make sure to paste the public key for the Avi SE in your deployment. The key shown here is only an example and will not work with your Avi SEs.
3. Add the Avi SE Hosts to the Avi Controller
If you are continuing with the wizard, this section describes how to add the Avi SE hosts to the Avi Controller.
Note: This step will not succeed unless SSH setup steps has been completed on the Avi Controller and Avi SE hosts.
- For each Avi SE host, enter the values and click Add New Host. After all the Avi SE hosts are added, click Complete.
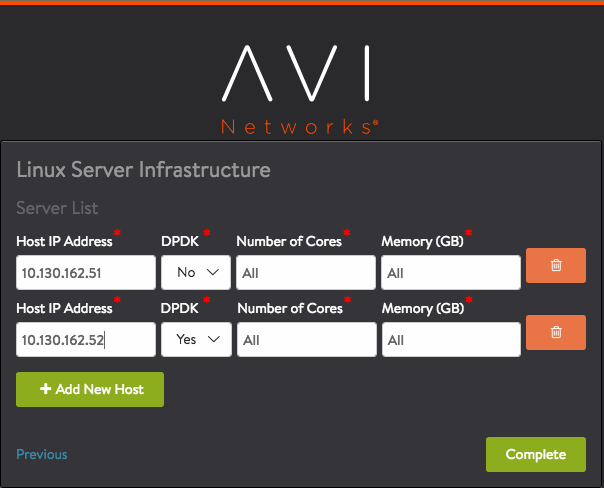
- In the Support Multiple Tenants window, click No:
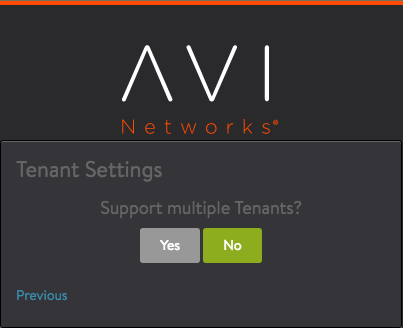
In the Avi Controller web interface login popup, enter the user name and password added when using the setup wizard.
 If you clicked through the SSH or Avi SE host pages of the wizard, see the following articles to complete installation:
