Configuring Avi Vantage for Application Delivery in Amazon Web Services
Overview
This document describes the process of configuring Avi Vantage as an application delivery controller for application workloads running inside Amazon Web Services. Avi Vantage offers elastic application services that extend beyond load balancing to deliver real-time application and security insights, protect data and applications with WAF, simplify troubleshooting, auto scale predictively, and enable developer self-service and automation in Amazon Web Services.
Avi Vantage integration with AWS is divided into the following sections:
- Installing Avi Controller or connecting to Avi SaaS
- Configuring Amazon Web Services on Avi Vantage
- Configuring virtual services
To install or provision the Avi Controller in AWS, refer to Installing Avi Controller in Amazon Web Services.
Notes:
Use the instructions mentioned in this article to connect your cloud to an Avi Controller.
These instructions are applicable both for customer-managed Avi Controller as well as connecting to an Avi Saas Controller.
For more information on Avi Vantage’s components, refer to Avi Vantage Architectural Overview.
Prerequisites
- Ports for management and network services
- Credential methods
- Knowledge of AWS VPC
Enabling Ports for Management and Network Services
Avi Controller and Avi Service Engines use specific ports for management and network services. The firewall should allow traffic for these ports.
For the detailed information on the required management ports, refer to Protocol Ports Used by Avi Vantage for Management Communication
Configuring Credential Methods
Avi Vantage can be configured using one of the following credential methods:
-
AWS customer account key: A unique authentication key associated with the AWS account. Access credentials are needed by the Avi Controller to communicate with AWS APIs.
Note: AWS cloud configuration with Avi SaaS only supports the Use Access/Secret Key credentials method.
For more information on using access key on AWS, refer to Managing Access Keys for Your AWS Account User. - Identity and Access Management (IAM) roles: IAM roles are the set of policies that define access to resources within AWS. The roles and the policies that define their access are defined in JSON files. This method does not require an AWS account key. Instead, the role and policy files must be downloaded from Avi Networks and installed using the AWS CLI. (Download links for the role and policy files, and the required AWS CLI syntax, are provided in IAM Roles.) After setting up the IAM roles, return to this article to install the Avi Vantage EC2 instance. Use this method if you don’t want to enter AWS credentials.
Following are the mandatory IAM roles that should be configured through Amazon Management Console:
- vmimport
- AviController-Refined-Role
Note: During cloud creation in AWS, an AMI is created using which Service Engines are created. As part of AMI creation, a vmdk disk image is imported to AWS as a snapshot and then the snapshot is registered as an AMI. So, vmimport role is required for importing VMDK disk image in AWS as a snapshot.
For more details on IAM roles, refer to IAM Role Setup for Installation into AWS.. - Use Cross-Account AssumeRole: Avi Vantage can be deployed for Amazon Web Services (AWS) with multiple AWS accounts utilizing the IAM AssumeRole functionality that provides access across AWS accounts to the AWS resources/API from the respective accounts, instead of sharing user Access Key ID and Secret Access Key from different accounts.
For the detailed information on Cross-Account AssumeRole, refer to AWS Cross-Account AssumeRole Support.
AWS Cloud Configuration
Follow the steps below to create a cloud configuration of type Amazon Web Services, so that Avi Vantage can spin up Service Engines in the required availability zones.
-
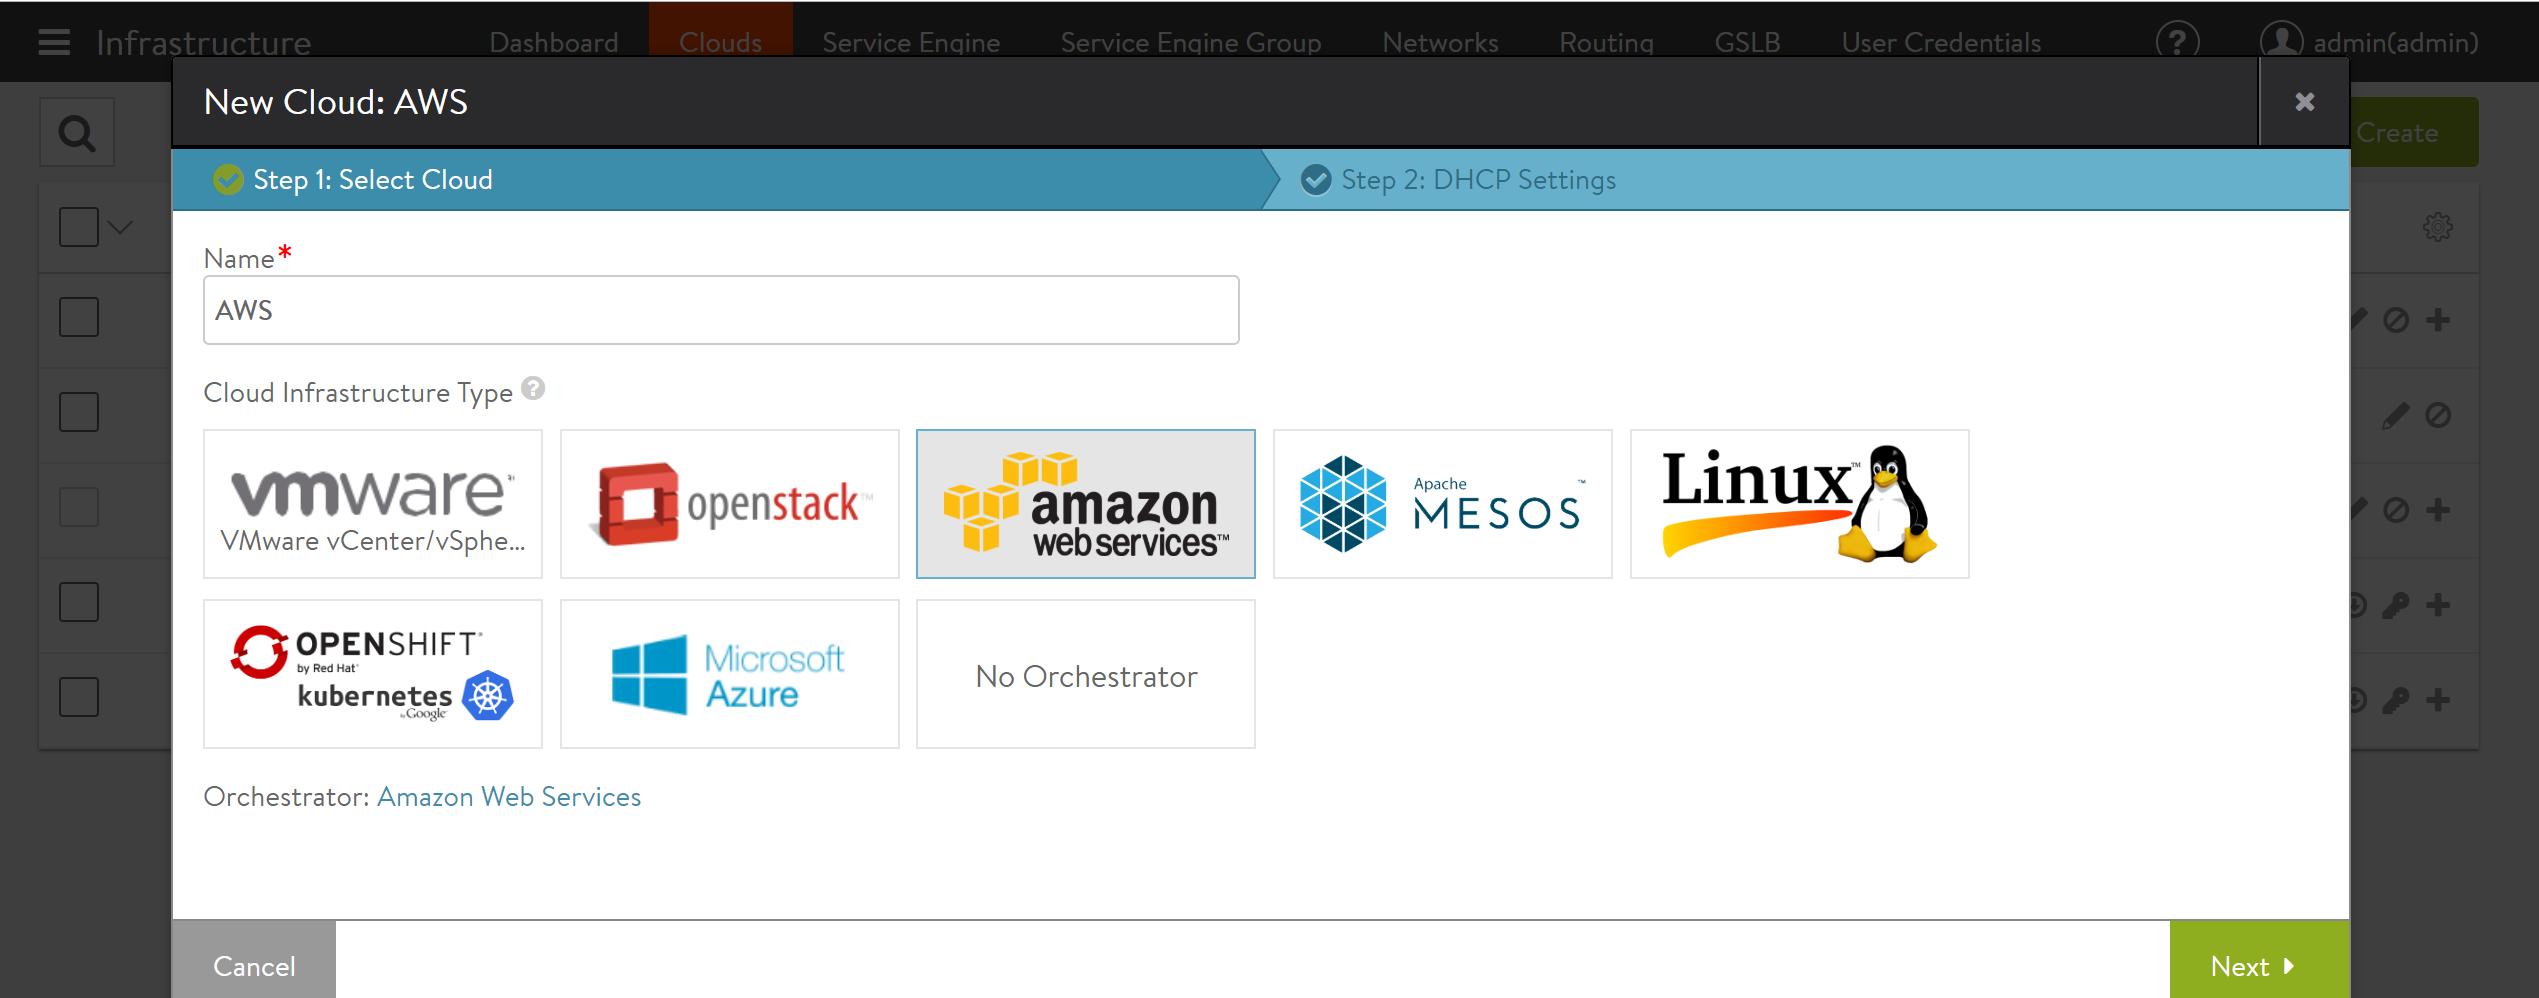
Log in to the Avi UI and navigate to Infrastructure > Cloud, provide the desired name, and select the cloud type as Amazon Web Services. Click on Next.
-
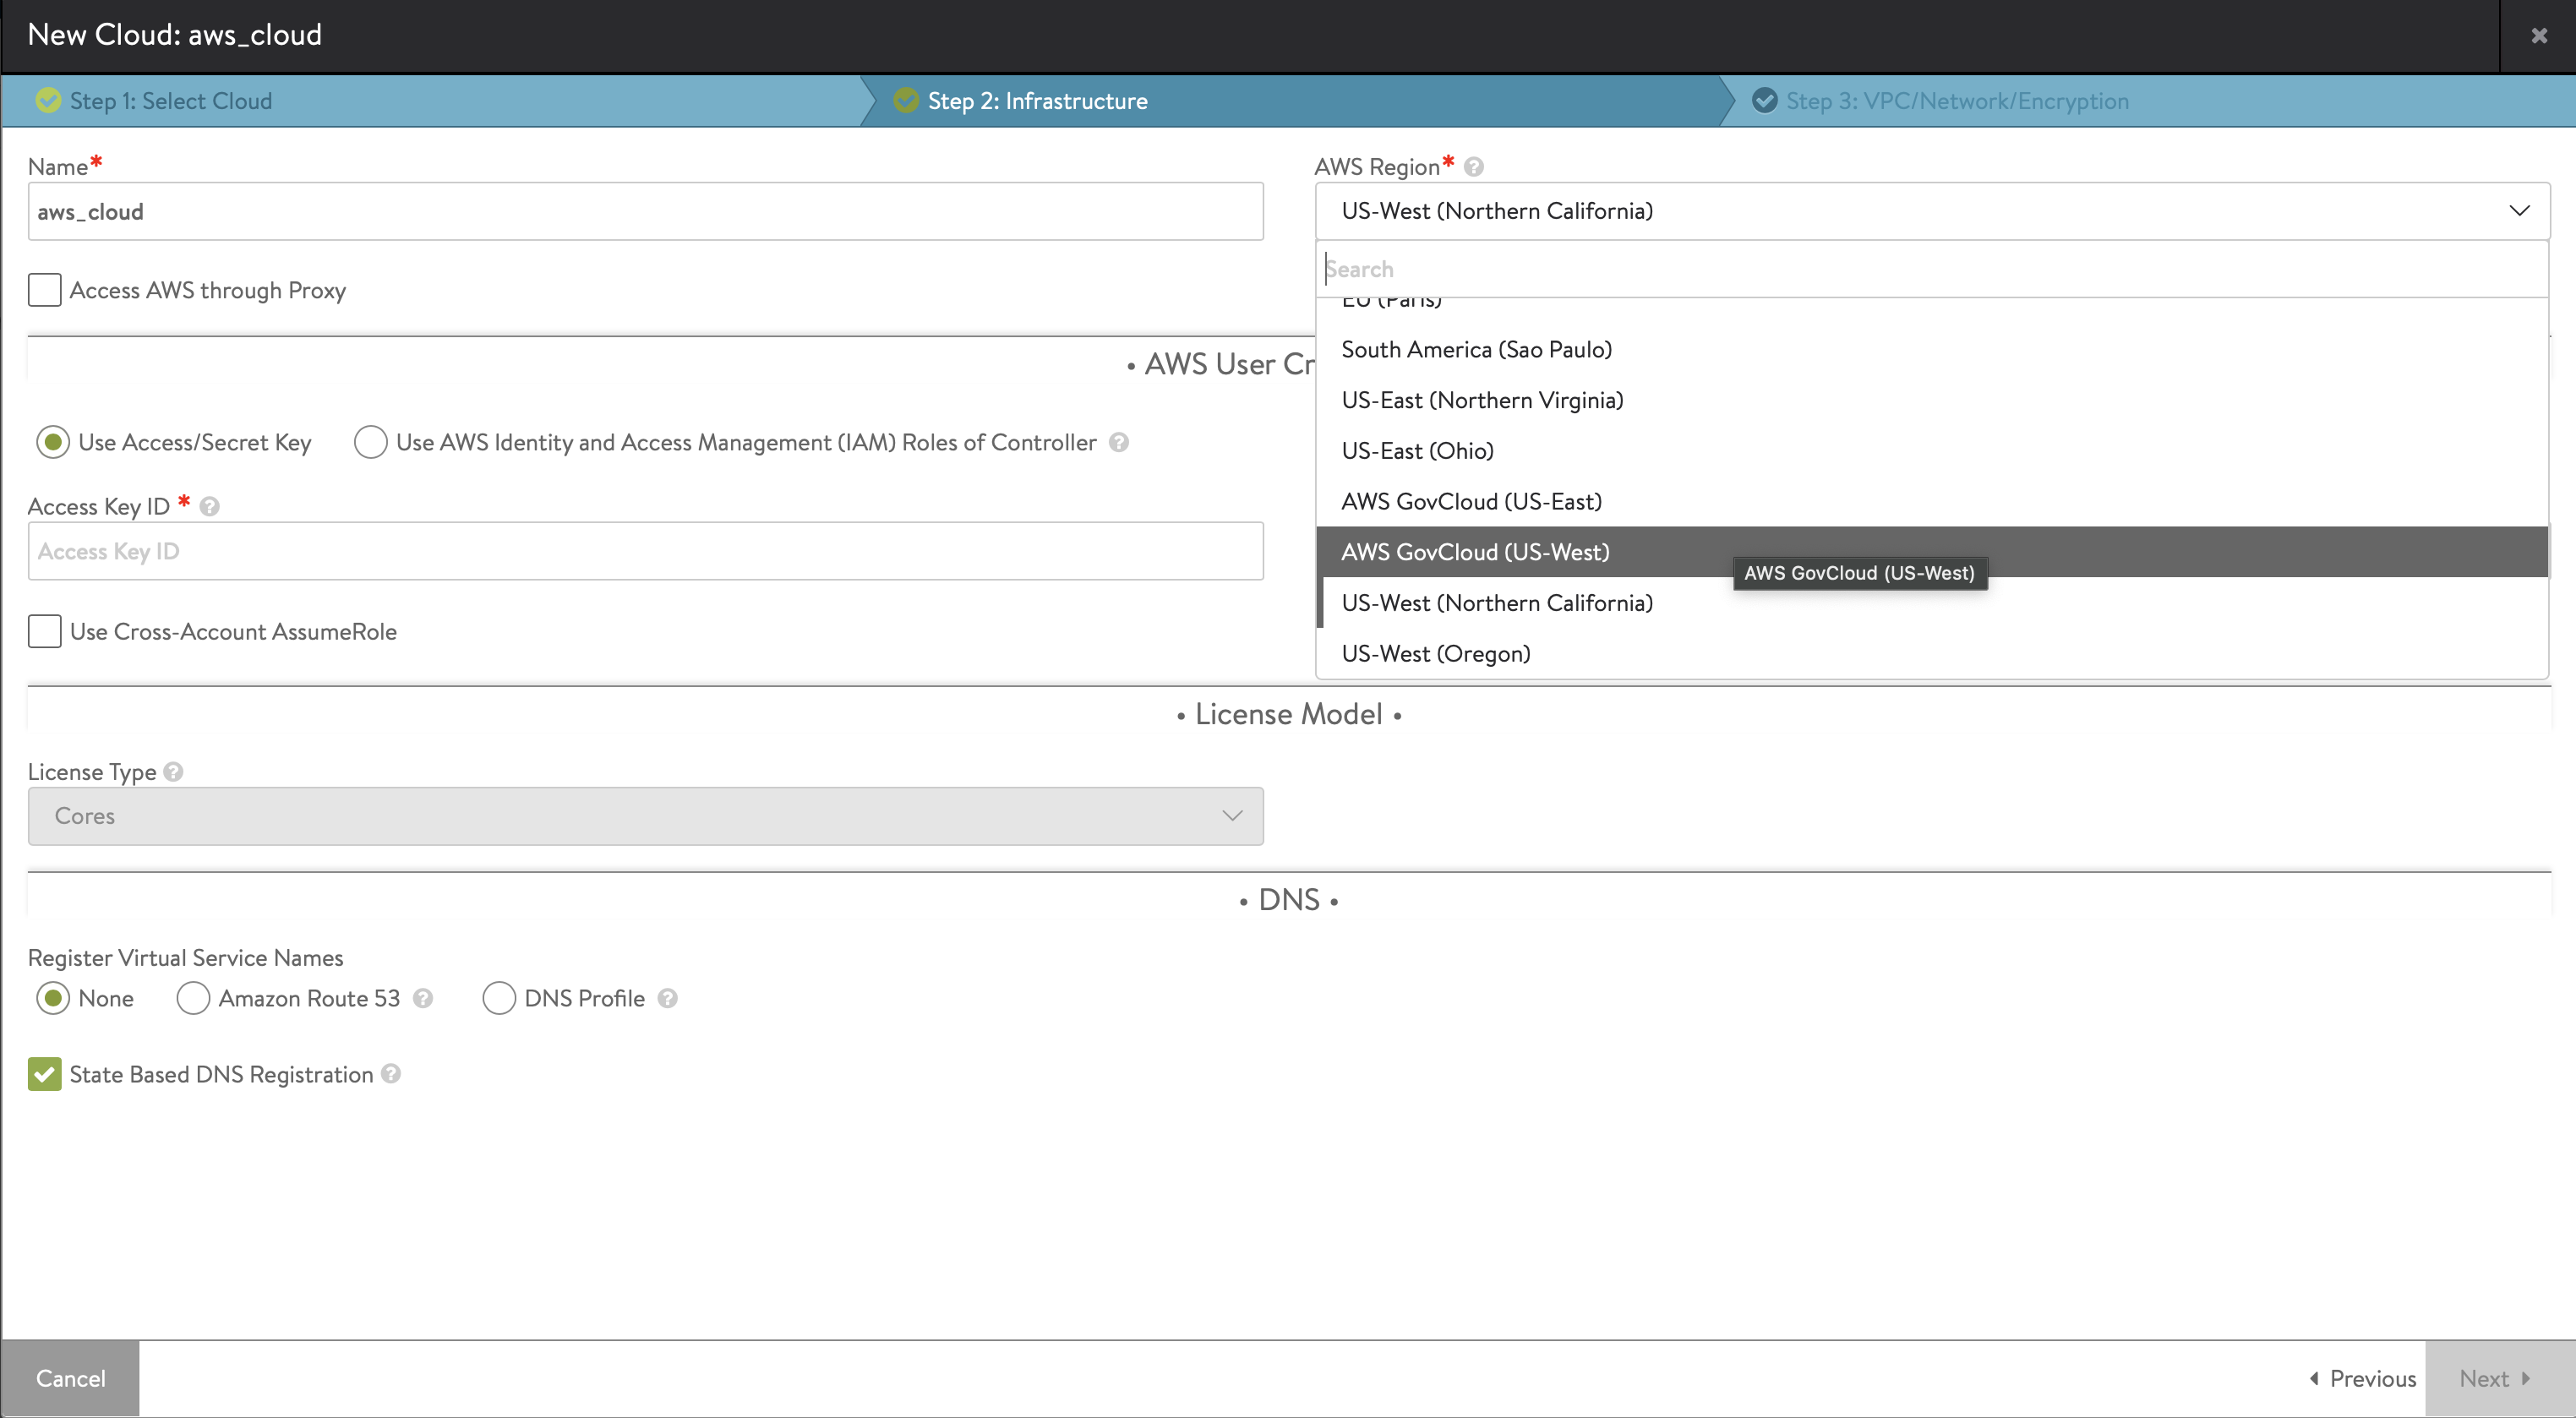
Use the drop-down menu to select AWS Region.
Notes:
- Support for AWS GovCloud (US-East) is available. Both AWS GovCloud East and GovCloud West regions are now supported.
- Starting with Avi Vantage version 21.1.4, Asia Pacific (Hong Kong), ap-east-1 is added to the list of AWS regions.
Starting with Avi Vantage version 21.1.4, new Flavours are introduced to support AWS regions.
- c5.12xlarge
- c5.24xlarge
- c5.metal
- c5n.metal
- m5.16xlarge
- m5.8xlarge
- m5.metal
- m5n.12xlarge
- m5n.16xlarge
- m5n.24xlarge
- m5n.2xlarge
- m5n.4xlarge
- m5n.8xlarge
- m5n.large
- m5n.metal
- m5n.xlarge
- r5.16xlarge
- r5.8xlarge
- r5.metal
- r5n.12xlarge
- r5n.16xlarge
- r5n.24xlarge
- r5n.2xlarge
- r5n.4xlarge
- r5n.8xlarge
- r5n.large
- r5n.metal
- r5n.xlarge
-
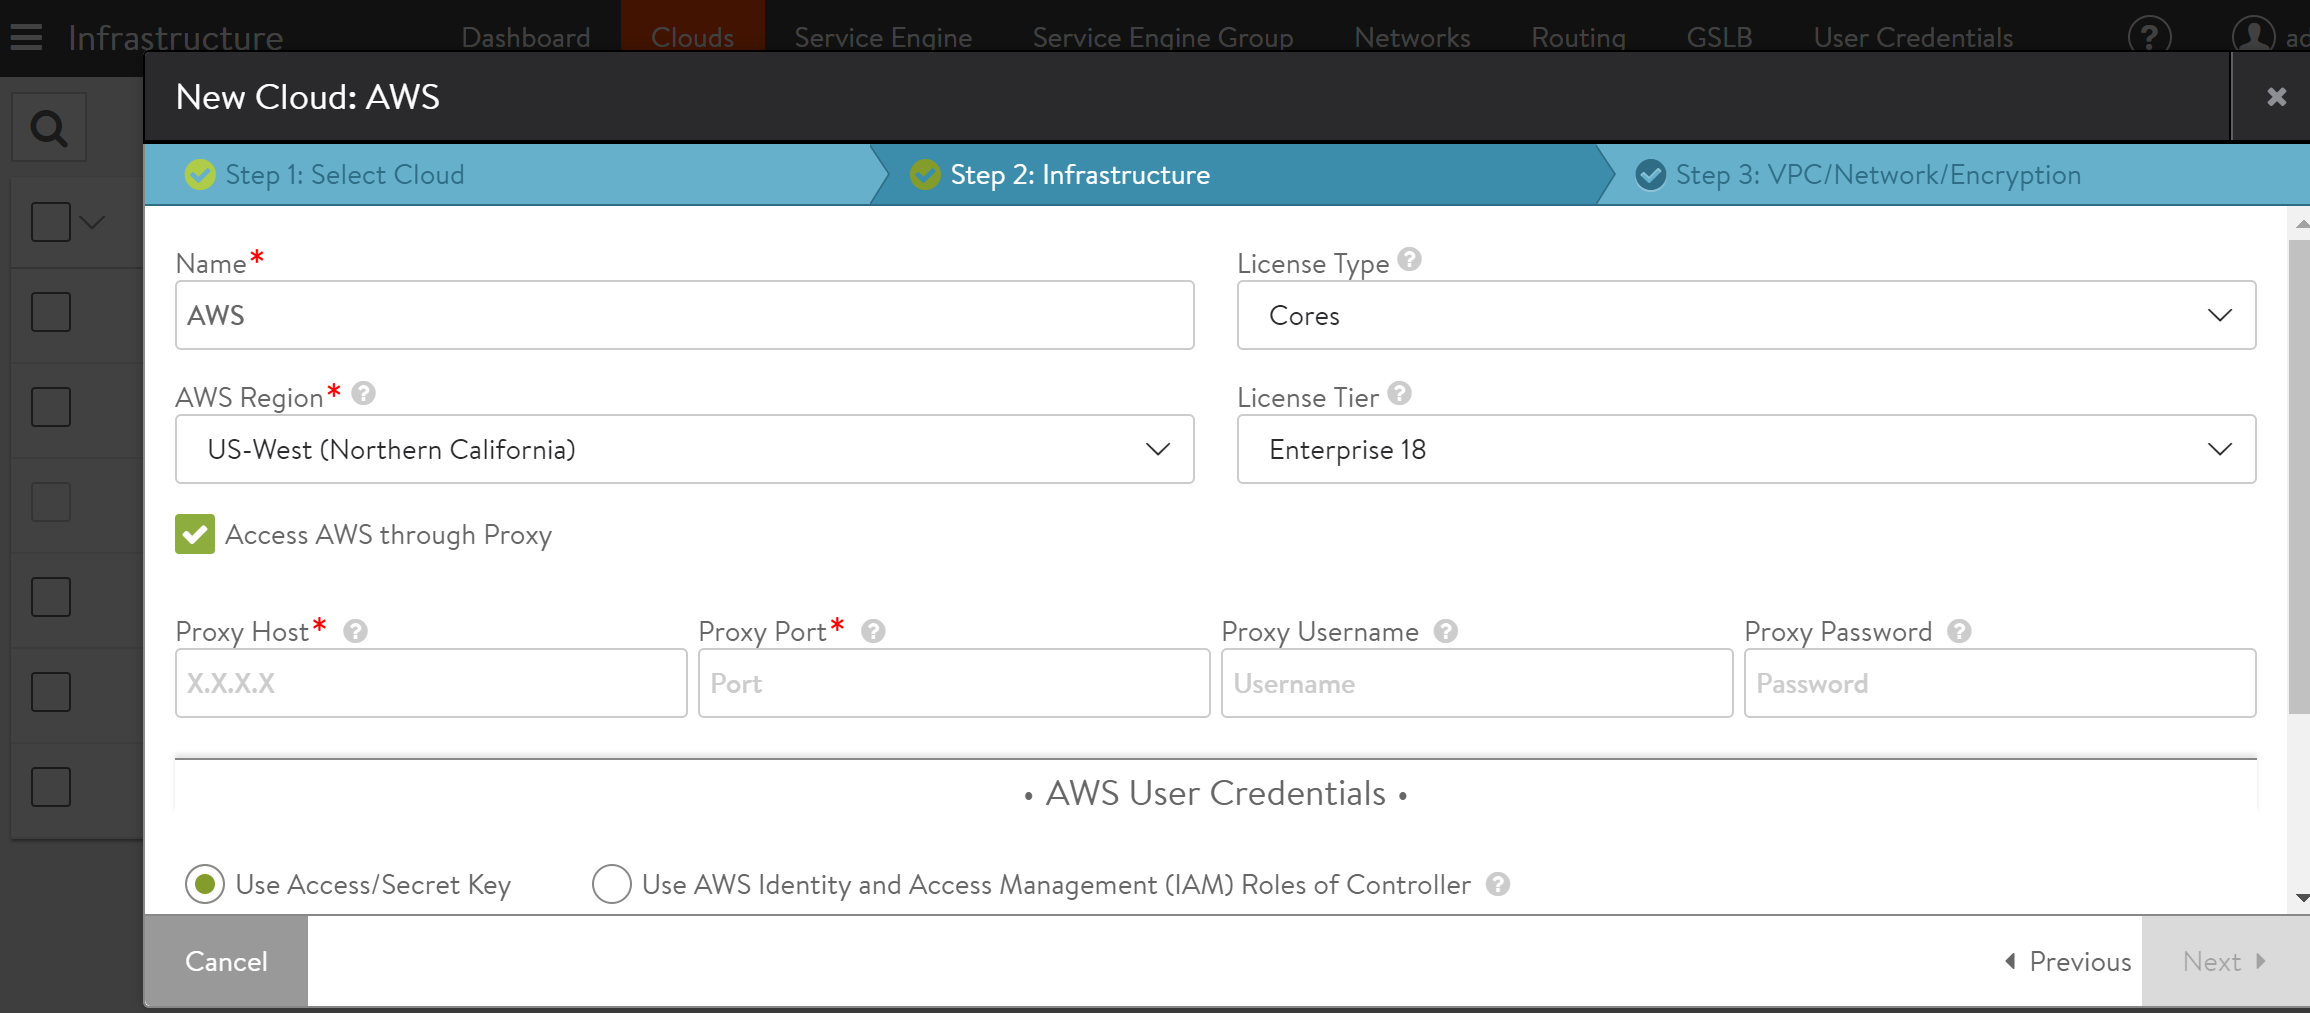
Enable the Access AWS through Proxy if there is a custom proxy between your corporate network and AWS. Provided details for Proxy Host and Proxy Port if required.
-
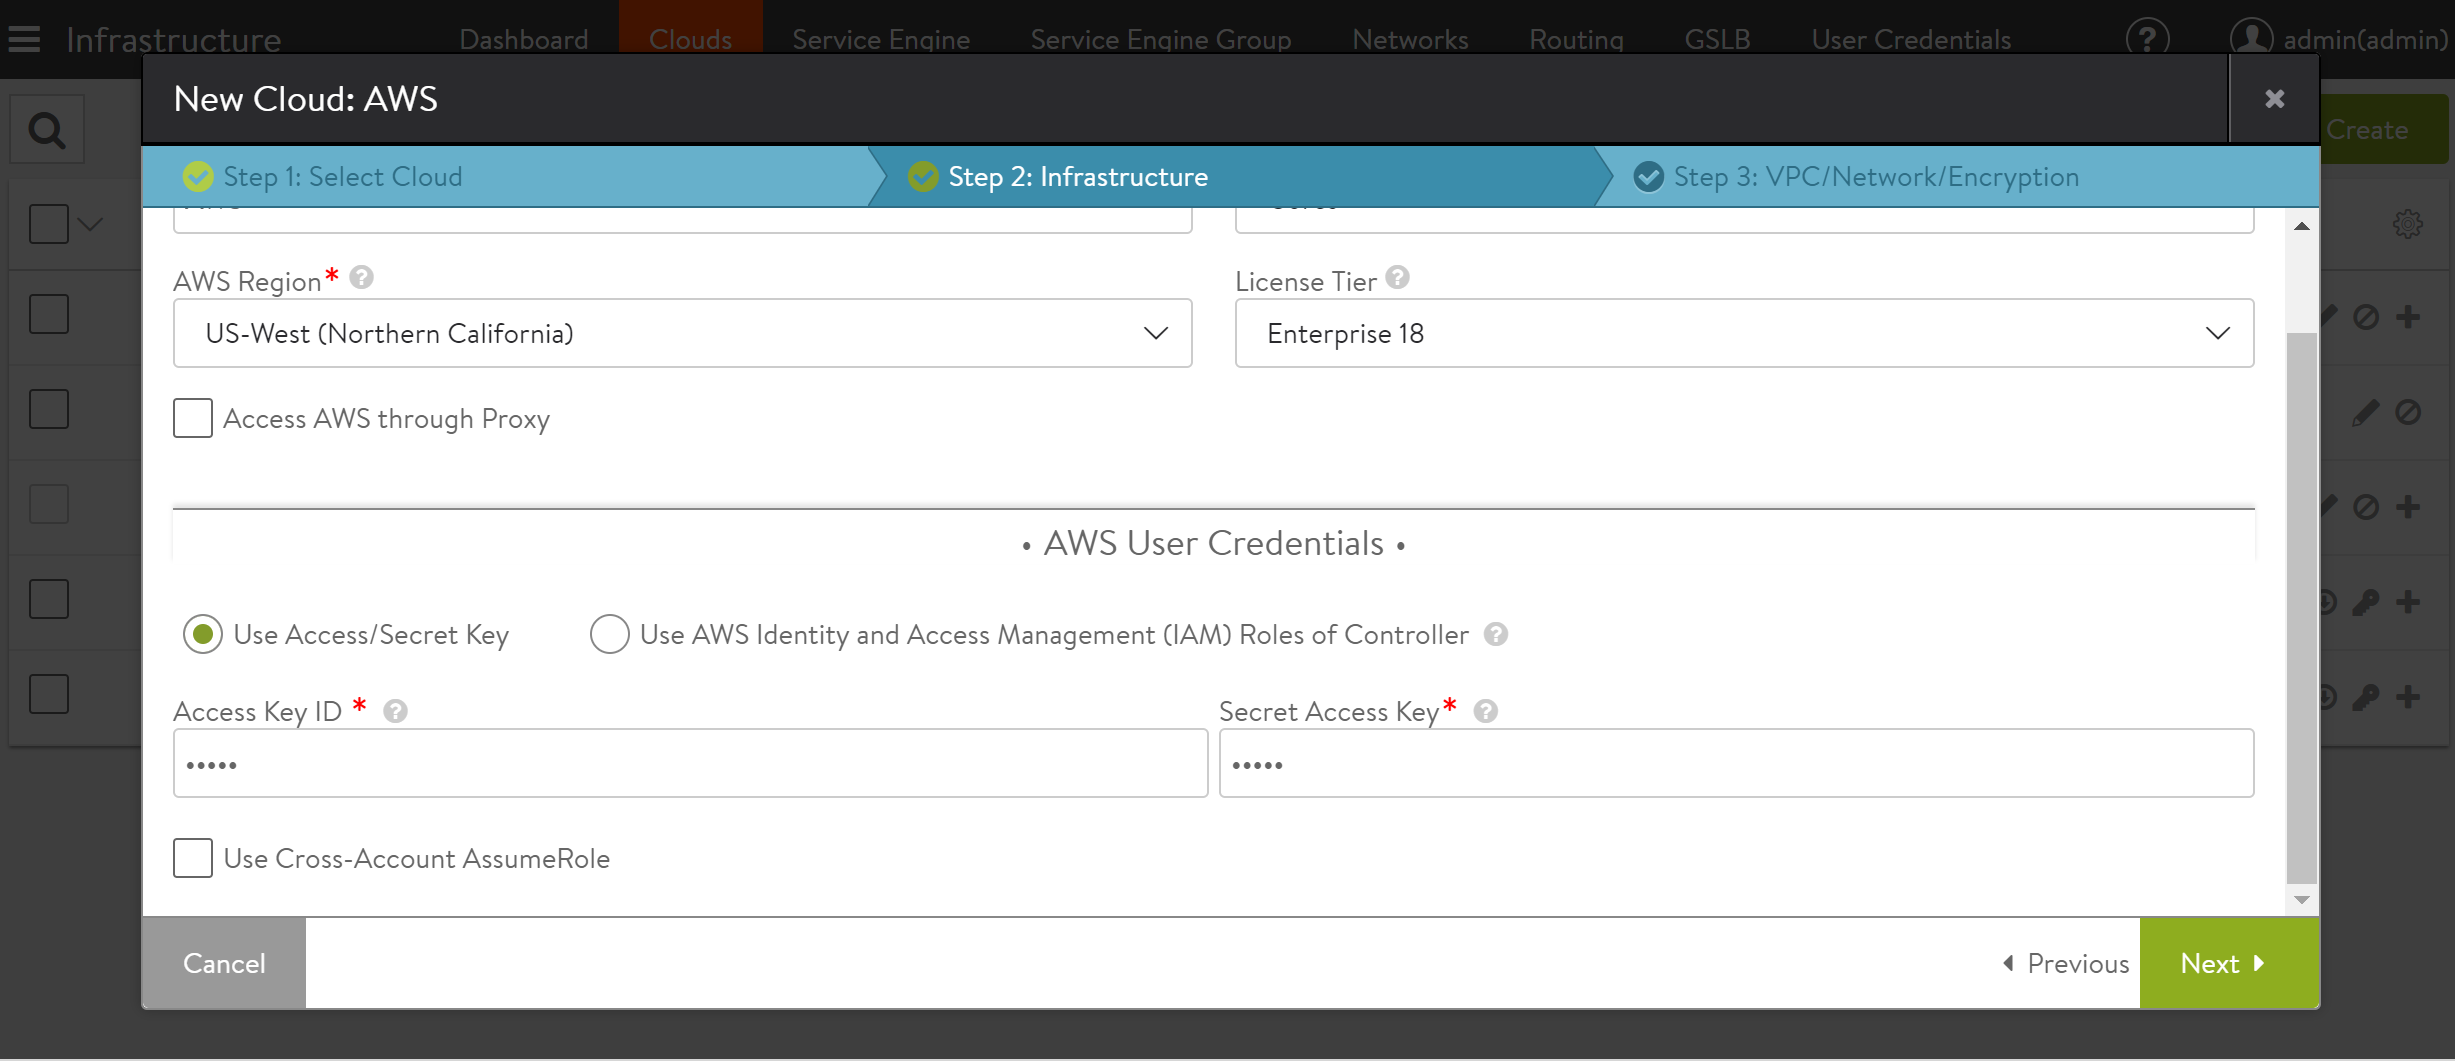
Access credentials are needed by the Avi Controller to communicate with AWS API. Provide Access Key ID, and Secret Key ID as shown below. Click on Next.
Note: AWS cloud configuration with Avi SaaS only supports the Use Access/Secret Key credentials method.
If using IAM roles, instead select Use AWS IAM Roles.
-
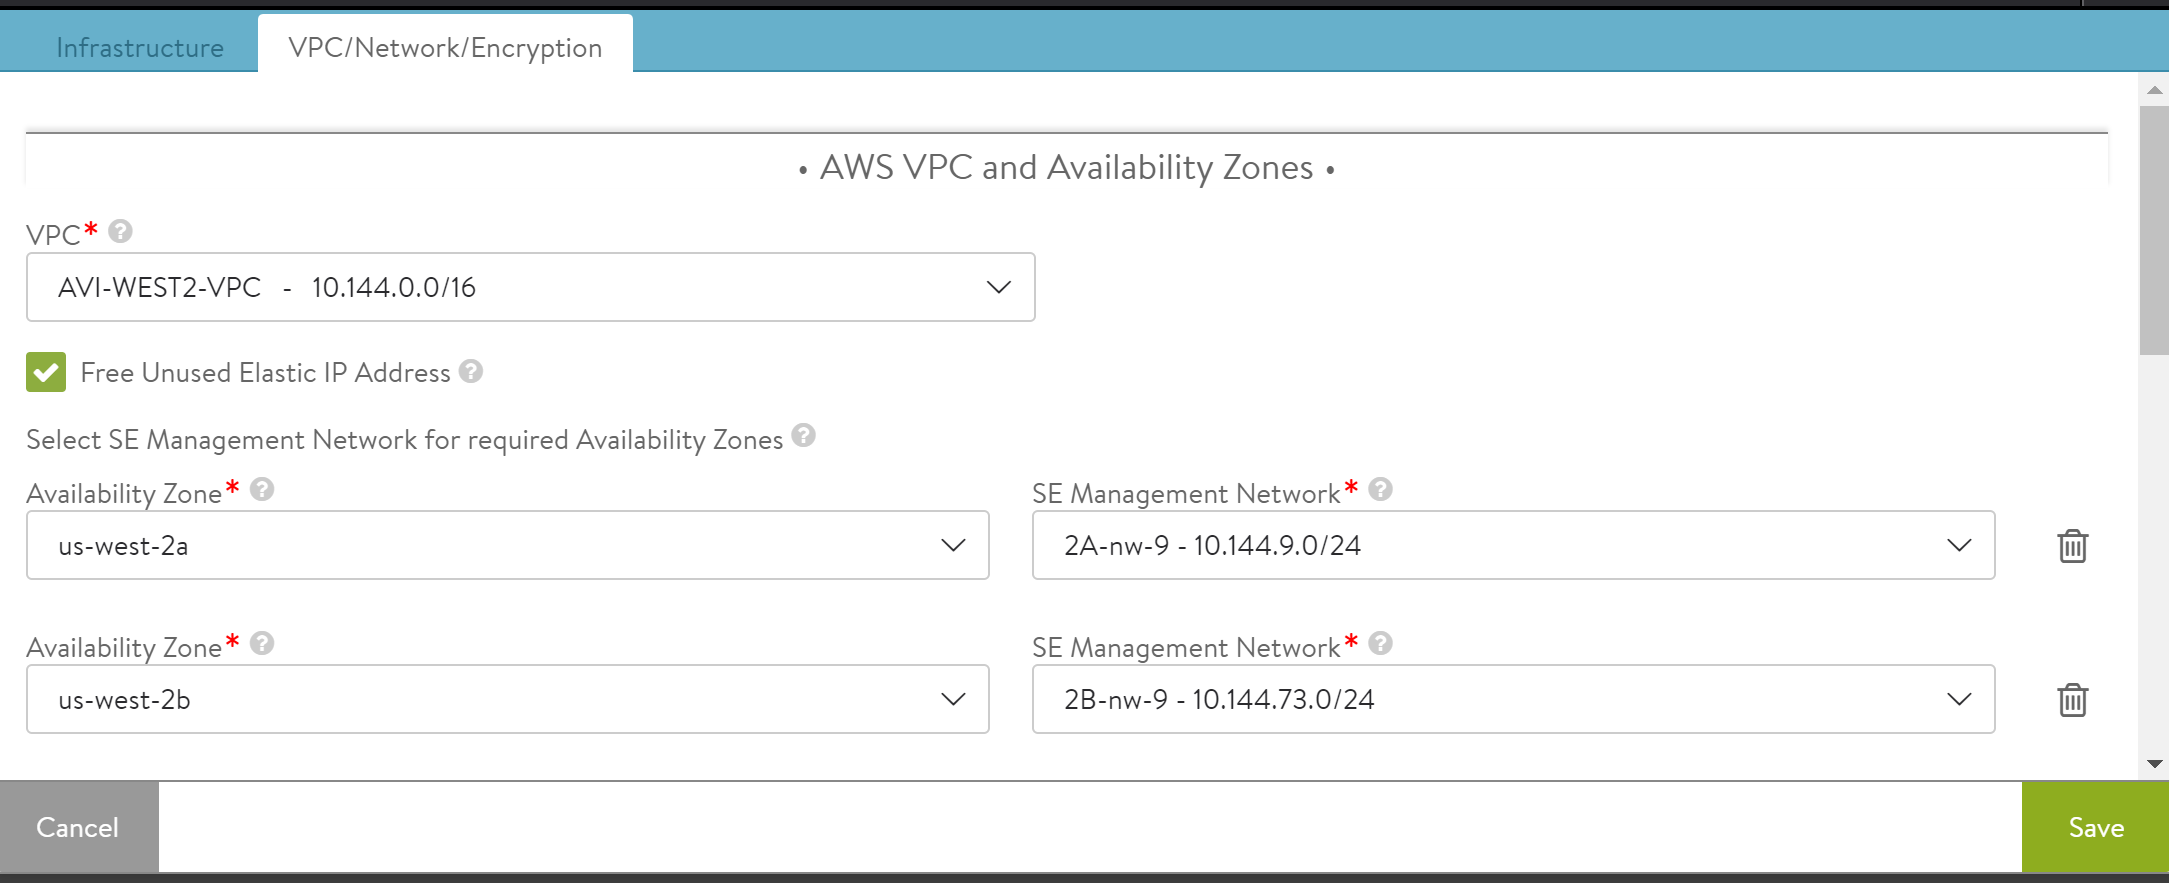
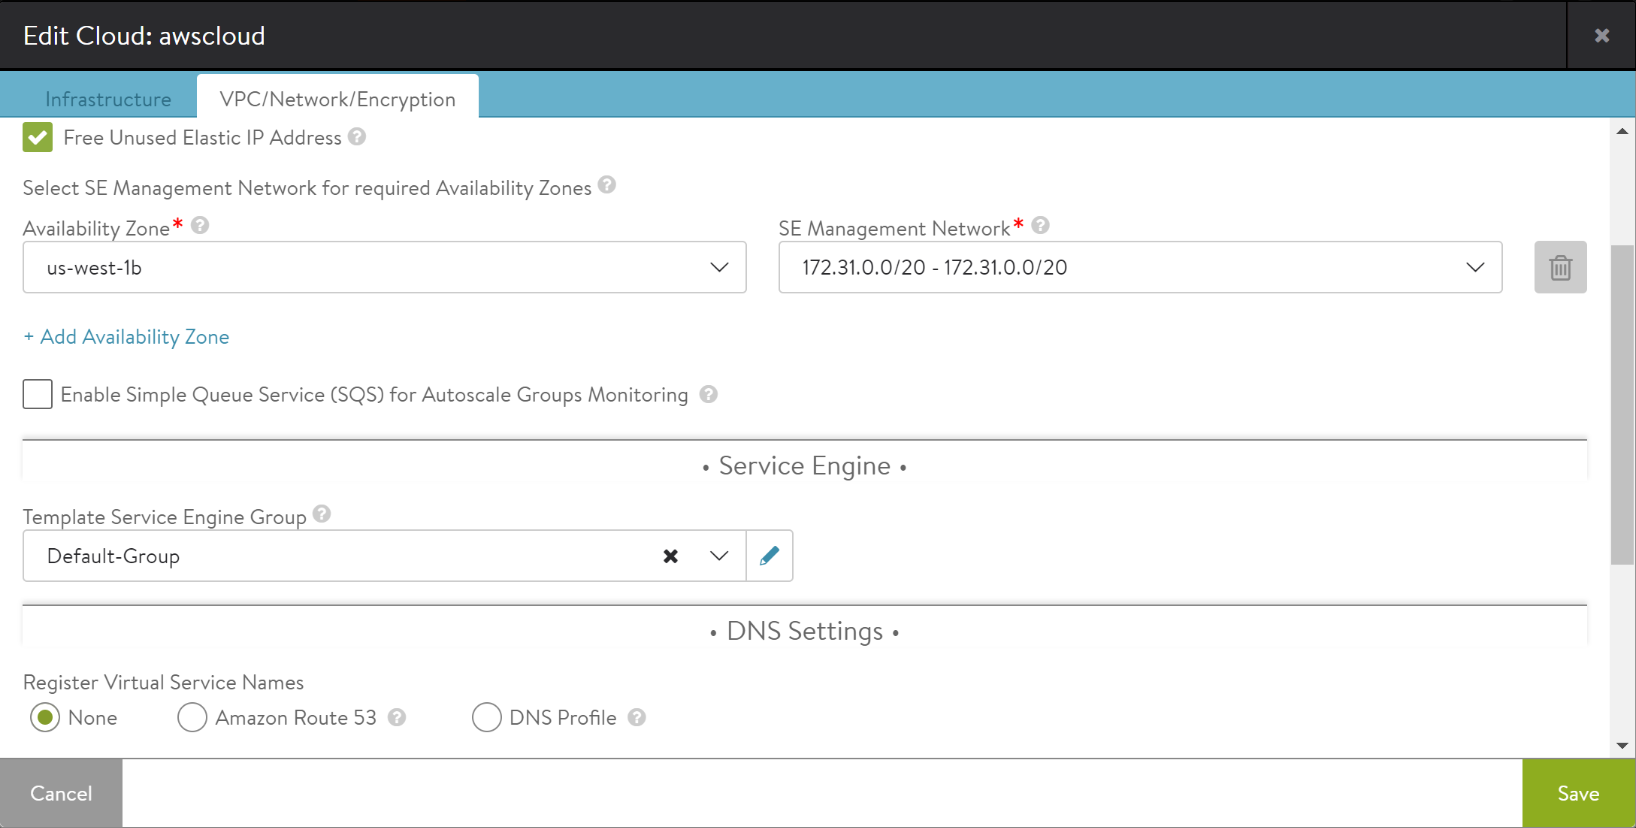
Configure SE Management Network. This is the subnet in which the Avi Controller will place the management vNIC of SEs. The management network of SE should be reachable from Avi Controller management IP address. Select the required Availability Zone, and SE Management Network. Note: While creating virtual service, make sure to select a VIP subnet that has reachability to the SE’s management subnet.
-
Select Template Service Engine Group from the drop-down list from Service Engine section.
-
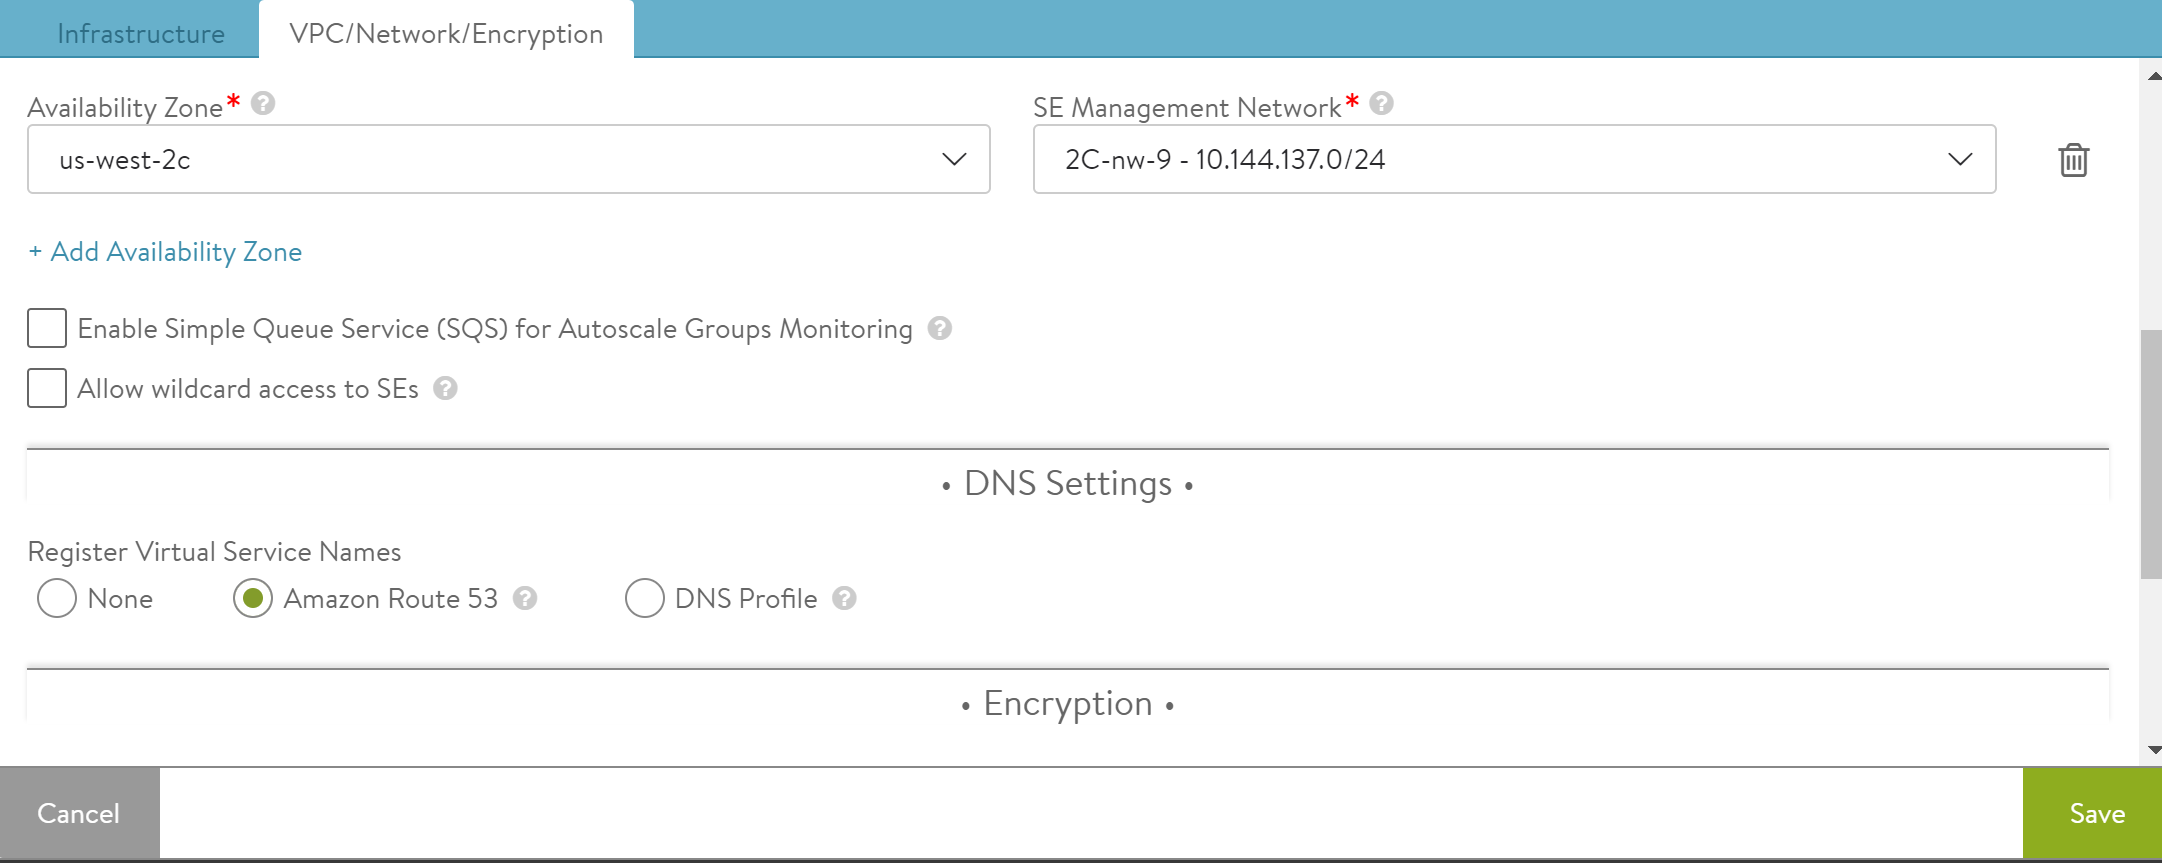
Select the desired DNS Settings, and other settings as required. Click on Save once all the desired options are selected.
-
To verify the installation, navigate to Infrastructure > Clouds, click Default-Cloud, and then click the Status button.
-
Status should turn green, indicating the installation was successful.
Instance Types for the Avi Service Engines:
Avi Service Engines are deployed on AWS automatically by the Avi Controller, as required for the virtual services that have been configured.
Avi SEs can be run on various Instance Types. For configuration, navigate to Infrastucture > Service Engine Group, click on the edit option, and select the Advanced tab.
IP Addresses Per Network Interface Per Instance Type shows the maximum number of network interfaces on a per-instance-type basis, as well as the maximum number of IPv4 and IPv6 addresses per interface.
Note: Currently Avi uses 1 data vNIC for all data traffic. This is apart from the 1 vNIC used for control-plane communication with the Avi Controllers and other Service Engines.
Encryption Options Available for AWS Deployment
- SNS and SQS Encryption
Server-Side Encryption (SSE) of Amazon Simple Queue Service (SQS) message queues is supported by Avi Vantage starting in release 17.2.8. Encrypting a queue does not encrypt backlogged messages, nor does turning off encryption remove encryption from backlogged messages. SQS queue encryption is supported only in 3 AWS regions as of the time of this writing: US EAST (N. Virginia), US EAST (Ohio), and US WEST (Oregon).
For more information on SNS and SQS encryption, refer to the following articles: - EBS Encryption
Amazon EBS encryption is a solution offered to encrypt EBS volumes. Encrypting EBS volumes and attaching it to the supported instance type encrypts the data inside the volume, all data moving between the volume and the instance, all snapshots created from the volume, and all volumes created from those snapshots. Starting release 17.2.3, Avi Vantage supports enabling EBS and S3 encryption using AWS SSE-KMS which encrypts the Amazon Machine Image (AMI).
For more information on Amazon EBS encryption support, refer to Amazon EBS Encryption Support in Avi Vantage.
Shared VPC Support
Starting with Avi Vantage release 22.1.2, shared VPC is supported for virtual services deployed in the AWS environment.
AWS supports VPC Sharing, which allows customers to easily span out a single VPC across multiple participating accounts belonging to the same organization, wherein customers can create resources like EC2, Lambda, and others.
For more information on AWS Shared VPC, see Shared VPC.
Shared VPC has the following advantages:
- Creating fewer VPCs to deploy the same workload, sharing VPCs across accounts.
- High density of CIDR block usage for VPC subnets. Using the shared VPC avoids CIDR overlap that is encountered with multiple VPCs.
Prerequisites for Private Hosted Zone
When creating a private Hosted Zone in Route53, a VPC association is required for Hosted Zone to resolve queries from. However, in case of a shared VPC, a prior association is needed with owner account, which are as follows:
- Create Association Request from Participating Account (the one creating private hosted zone) - Create VPC Association Authorization
- Create Association from Owner Account with VPC and Hosted Zone ID - Associate VPC With Hosted Zone
- Go to the Private Hosted Zone and Edit > Add VPC.
VPC Association is done through:
- AWS CLI
- AWS SDK
- AWS Route53 API
For Public Hosted Zones, there is no need for a VPC association.
Additional Information
- AWS Cross-Account AssumeRole Support
- Sizing Service Engines
- SSL Performance
- Avi Integration with AWS Auto Scaling Groups
- Multi-AZ Support for AWS
- Controller Cluster Deployment Across Two Availability Zones
- IAM Role Setup for Installation into AWS
- DNS Provider (AWS)
- DNS Provider (IPAM)
- Configuring a Tag for Auto-created SEs in AWS
- Custom Security Groups in OpenStack and AWS Clouds
- Further Tightening Security in OpenStack and AWS Clouds
- Autoscaling in Public Clouds

